A deck is a wonderful addition to any home. It is a versatile outdoor living space that allows you to have a place to grill, relax with family and friends, enjoy a great meal, or just lounge and enjoy a cool evening. With the use of composite materials or even wood materials with annual maintenance and care, your deck can last for decades, which is why it is so important to make sure it is built the right way so you can enjoy it for all the years to come.
Whether you are planning to do it yourself, or leveraging the expertise of an experienced deck builder, this guide will give you some tips and tricks as well as share experience from the seasons pro’s at A Deck Above.
Step 1: Sharing Ideas and Creating a Design that Fits Your Needs

It all starts with ideas. It can be ideas about how you want the deck to fit in your space, what materials you want to use, or most importantly, how you want to use your space. You can get inspiration from places like Pinterest or Houzz, or if you are working with a deck builder you can get inspiration from their previous builds.
If they have a gallery page like ours, you can get a sense for the types of decks they build (straight forward, different designs, unique layouts, etc) and a sense of their quality as well. Or you can look at different posts that can help you design a deck that is your own.
After you have a sense for what you want, it’s good to see if your deck will support that dream. Do you want to use your deck for outdoor dining? If so, what size table do you want? If that table is 6 feet long and people are sitting in chairs at both ends, do you want the deck to be 12’ or 14’ long in that direction so there is enough room to walk around without having to be right up against the rail? You don’t want to build the deck twice, so a little extra time up front saves a lot of headaches later.
At A Deck Above, when we have our estimate consultation with you, we can walk through these types of questions to help get a sense of what your space will be used for and how it can be built to be enjoyed. We can also share design tips and ideas that we have learned from doing this for over 30 years. We can share experiences and insight from previous projects to help you make more informed decisions so you can have a space that you will enjoy for decades.
Beyond the design, another important decision is what type of material do you want to use for the deck and railing? While treated lumber is a classic choice, new composite and PVC decking materials are low or no maintenance and last a lot longer.
Some of the larger composite brands, like Trex or Timbertech, even have visual designers that help you see what a design can look like as you plan it out. From different decking colors to different rail materials, they have visual tools that can give you a sense of the final look before you commit.
Step 1b: Quotes and Estimates

This part is for if you are hiring a contractor to build your deck for you, although it has some good pointers even if you are going to build it yourself.
If you are hiring someone to build your deck, it is also important to do some research on that potential contractor as well. Below is a list of some of the research points we encourage our potential customers to research about any contractor they are considering:
- Was the person you met helpful? Did they listen to what you wanted out of the project, or did they just push their own ideas? In general, you are hiring them and they should be looking for ways to help bring your dream to life.
- Are they reputable? Do they have good reviews, or do they have referrals of past customers they can provide? See if their reviews sound genuine or are they just a lot of accounts repeating the same thing. Do the reviews reference anyone by name? That can let you know if the people doing the work or running the project made an impression and were open to talking and explaining anything.
- Are they licensed and/or are they licensed general contractors? This can vary from state to state, but in general, anyone can be licensed by having a license from the city or town they do business in. Licensed general contractors are typically state licensed and have to do testing to prove their knowledge. Some states also do specialty licenses for certain trades that test their knowledge as well without having to know areas they will never do work in. It is not always required, but it’s good to know the person you are hiring took the time to go through the right channels.
- Are they pulling permits? Not all projects require permits, but anything structural should have one. This is important because it makes sure a third party is checking all the work to make sure it meets code requirements. It also holds them accountable in case something does go wrong. If a contractor is asking you to pull your own permits that is not a good sign (or not pulling permits at all). It puts all the liability and risk on you, not them.
- Did they communicate well with you and answer all your questions? Whoever you hire is who you will be working with for the project. If they showed up late to your appointments, or took 5 days to answer you, are you comfortable with that for the remainder of your project? At the end of the day, having someone who is helpful and responsive may save you a lot of headache and worry down the road.
There are many more questions, but those are just some to get you started. Another big recommendation is to get multiple bids on the job if you can. This helps you see the pro’s and con’s of different companies as well as get competitive prices.
An important thing when doing this though is to remember to compare apples to apples. If you have one company quote a deck that is twice as large and use high end materials while another quotes you for a smaller deck with cheaper materials, make sure you ask questions about the differences to help you compare them. Sometimes you do get what you pay for, but you need to make sure you are evaluating them appropriately.
So now you have come up with a design (and potentially hired someone to do the job). What comes next?
Step 2: Pre-Build Process Of A Deck
The pre-build process is essentially a lot of planning. And paperwork (depending on what you are doing). Below I will explain some of the key steps anyone should take and some of what A Deck Above does for their projects.
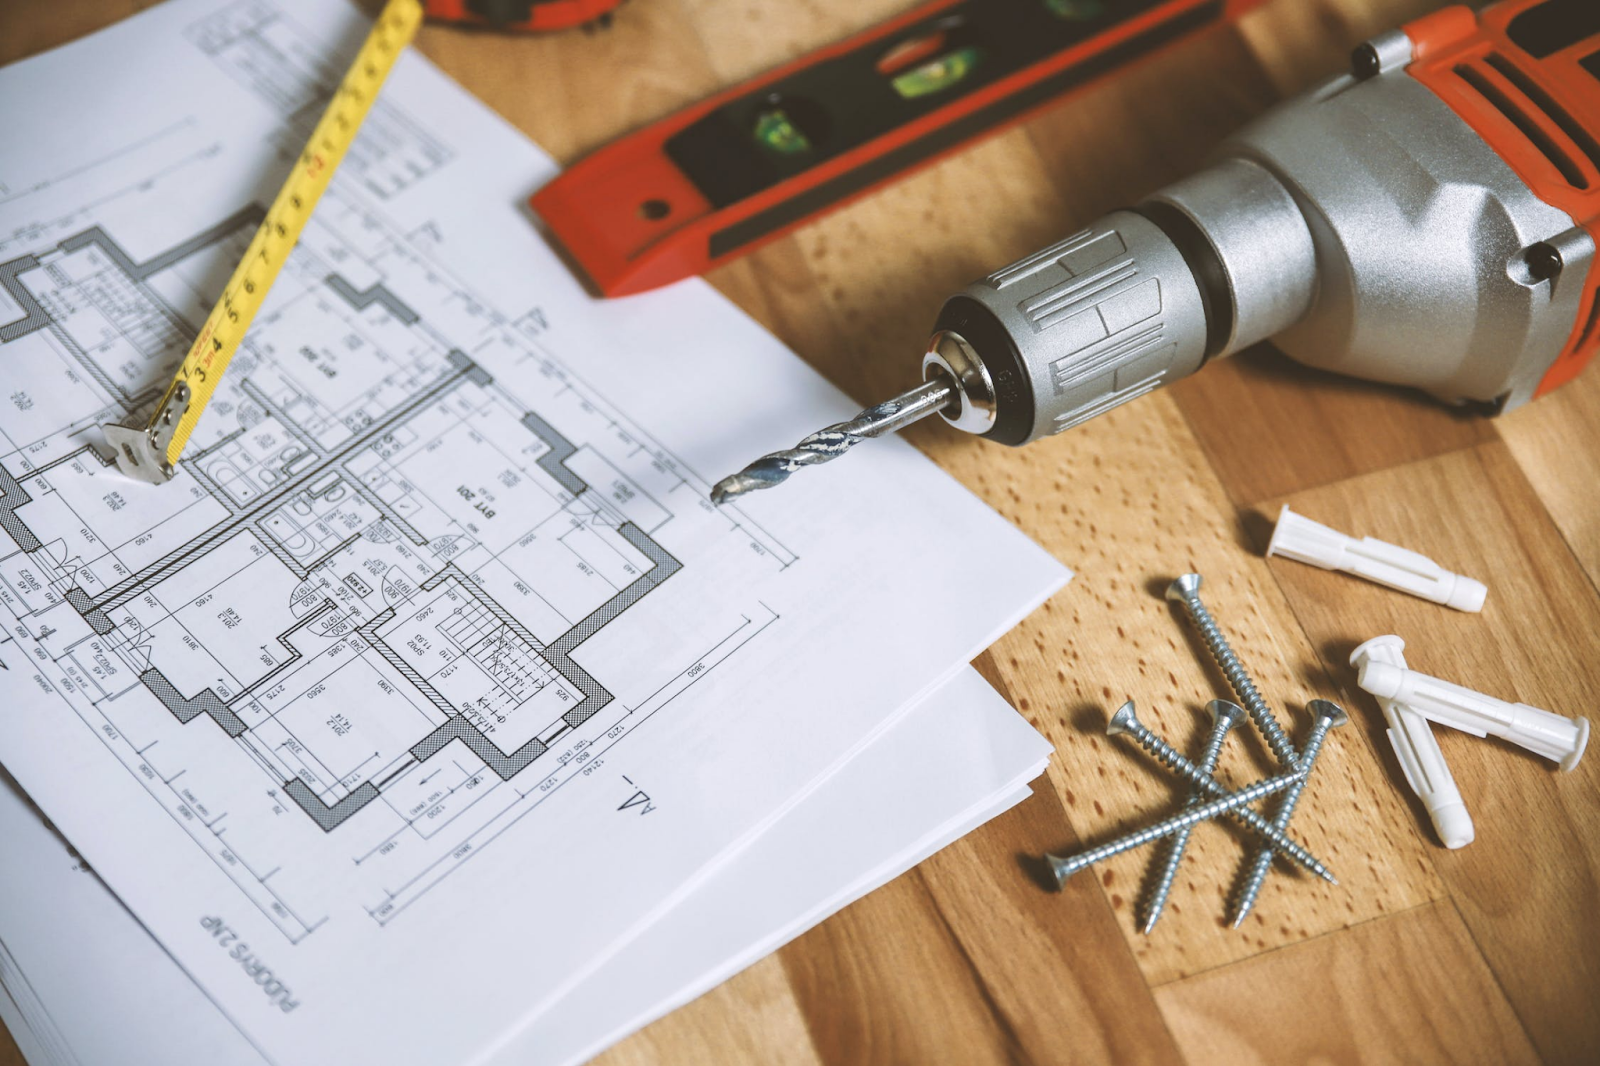
First off is getting the build plan complete for the deck and submitting the zoning and building permit paperwork.
For the build plan for your deck, you want to make sure it is built at least to code. I say at least because building codes are a minimum requirement. You can always build it better. You can use joists for example. While codes may say you can run a certain size joist 16” on center, most of the time we will do them 14” or 12” on center because with composite materials it helps them hold up longer. That’s not a code decision, it’s a quality decision.
Some key things to have on your build plan: footing locations and type, post types, is it freestanding or attached to the home, how high is the deck, does it have railings and what height. What kind of joists and at what spacing, the direction the decking is running, railing types and needs, etc. Luckily, if you are using a contractor you won’t have to deal with any of this.
The building plan is also important because it will likely be needed for your permit submission and it also can be used for your material take off (or the list of materials you need to build your deck).
For the permits, you may have to submit your zoning permit to one entity (like a town or village) and the building permits to another (like a county authority). Or you may have one entity that handles both (yay, less paperwork!). This may require additional information like a survey of your property or a plot plan. A lot of municipalities are helpful and can tell you what you need, or if you are using a contractor they will likely know all the required materials since they submit for permits often.
One of the other key steps in this process is ordering your materials. Especially if you are using a not so common material that may have special lead times. Depending on where you are ordering from, it may take an extended amount of time to get your materials.
For us at A Deck Above, we work with some of the area’s largest lumber yards and distributors. We have built relationships with them over the years and work smoothly with them to get materials quickly. We also work closely with them so if there is material that is damaged or does not meet our high standards, it is swapped out at no cost to the homeowner as we would never want to put something on someone else’s home that we wouldn’t put on our own.
*** A big thing to note recently is the demand for materials, especially as we come out of COVID. Some materials that used to be readily available are taking weeks or months to be produced and shipped. It is important to plan ahead and order early to make sure you get materials in a timely manner, or to make sure whoever you are working with understands the current market and has great relationships with suppliers so your project has minimal impact.
Once you have your materials, your build plan, and your approved permits (including HOA if you have one), you are ready to build! You can also take a look at this post we did that gives you some tips on the best tools and materials to upgrade your deck and deck installation.
Step 3: Starting The Build Of A Deck
You have your materials. You have your plans. It’s time to build!
One of the first steps we like to take in starting a build isn’t even building, it is checking the building materials. If you had the materials delivered this is a very important step.
Make sure what you ordered is what was delivered. Check the pieces of lumber to make sure there isn’t damage from forklifts that needs to be replaced. If you are using composite materials, are there scratches or gouges in the materials that need to be replaced?
This is one of the most important steps for us at A Deck Above because it allows us to make sure the material is correct, looks good, and that we can keep on building through the whole process instead of finding an issue and waiting on it to be fixed.
Next step is to start with the footings. You can mark where they are going to go with spray paint before you start digging so you can see the space. If you have utilities in that area, make sure to call a locating service to mark them before you dig. If you aren’t sure if anything is there you should have it marked. Better safe than sorry.
After you have dug your footings you will most likely need a footing inspection for the permit. While you are waiting on that you can get started on the framing process. You can check your joist material to make sure there are no issues with it, get it sorted so it can be installed with the crown up, and finally start the work of framing up your deck!
Once your framing is up, it’s time for the framing inspection (or open floor inspection depending on how you area classifies it). If you have done this a few times you may know how long it takes you to do certain things and call ahead for your inspection so you don’t have to wait.
Next up is typically decking your deck. If you are using treated decking, screw down your decking (they hold better than nails and allow for easier replacement if necessary). If you are using composite boards, hidden fasteners are the way to go as you don’t have to screw through the boards and it gives you a cleaner look. There will be some areas that need to be screwed down no matter what, so be sure to get color matching screws so they are less noticeable and go with your deck.
After decking, it is onto the railing (if your deck is really low to the ground you may be opting for no rail). With a wood rail make sure you have smooth, clean pieces for rail caps. If you are doing metal or composite rail be sure to set your posts correctly and fit the rail sections in between so your pickets are spaced accordingly.
After you have gotten the decking and railing complete, it is time to move on to the final steps.
Step 4: Final Steps For How To Build A Deck

The final steps of any project are just as important, or more so, than the construction steps. They can be small, tiny details that make a huge difference in the long run.
A big final step is adding any finishing materials that make your deck look trim and clean. If you are doing a composite deck, add matching or complimentary colored fascia wrap to cover up the edges of the deck boards and the outer bands. If you have a wood deck, a nice piece of 1×4 trim to cover the ends of deck boards also gives your deck a finished look.
A few other steps that A Deck Above does that just take the finished product to the next level include: Sanding wood rail cap materials so they are smooth and not splintered, checking all screws are not sticking out, replacing any material that doesn’t look correct (we only use dry decking and rail material, but they can still dry out a little more over the course of the job and need to be fixed), blowing off the deck and cleaning up the work area so your space is ready to be enjoyed.
And of course, who can forget, getting your final inspection. This is a last check that everything is done correctly and that your deck meets code requirements.
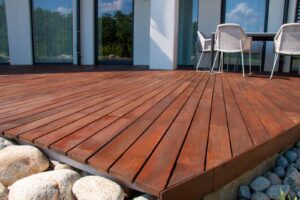
If you have a wood deck, or wood railing, this is a good time to get ready to stain it. We only use dry decking and railing material so it can be stained and sealed right away. If you use wet material it will need to dry out for a couple of months before you apply the stain. We highly recommend using dry material as the wood is very close to its final state when you build. With wet material it may look good at first, but as it dries it twists and bows and can end up looking pretty bad.
After all of this, it’s time for the last and best step.
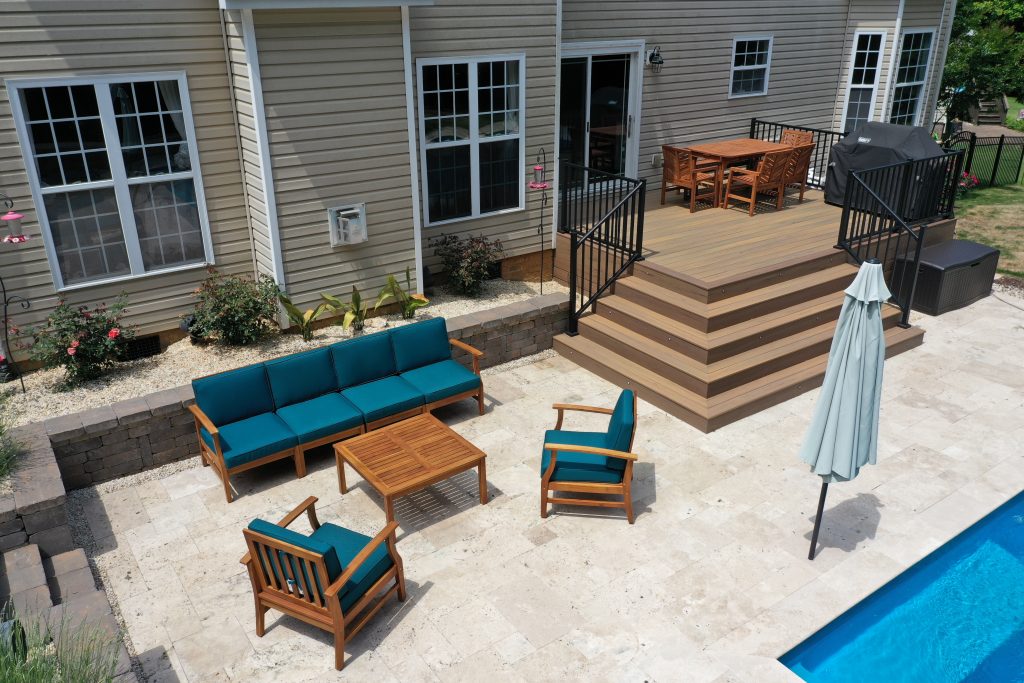
Step 5: Enjoy Your Deck!

Your deck is complete! It is time to enjoy it, make memories, hang out with your family and friends, and relax.
Now is when you can start decorating, getting furniture, and fire up the grill. If you are looking for inspiration, take a look at this blog post for some ideas. Or head over to a home improvement store to look at stuff in person.
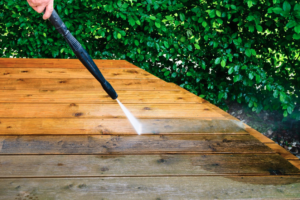
Along with enjoying your deck, don’t forget to do a little annual maintenance. A deck can last decades as long as it is properly cared for. If you have a composite deck, a little cleaning from time to time can keep it looking fresh. If you have a wood deck, make sure you are staining it every year, especially the deck boards, so that they last you as long as possible.
Now sit back, relax, and enjoy your new deck. Or, start planning for that one you are looking to build! And if you are in our area, we would be happy to build it for you to take as much of the stress out of the process as possible.